On a machine on wish you wish to mount your new NFS share, start up NetInfo Manager and authenticate by clicking on the padlock. You will probably already have a mounts property directory, but if you do not, then create it now and save your work. Add a new property to it, rename that property “default_protocol”, and give it the value “tcp”.
Select the mounts property directory, and use the New button to create a new subdirectory. The names of subdirectories underneath mounts have to have enough information to tell your computer how to find the remote computer and its share. The format is computername:/sharepath. In my case, my PowerBook is named falcon, and I have shared /Users as described on the previous pages, so I’ll name this mount “falcon:/Users”.
NFS mounts have a few properties that you need to specify. You do this by adding properties to your new mount via Directory->New Property from the menu bar. The additional properties are dir, which specifies where the NFS share will be mounted on your NFS client computer (this must be a path that is fed to automount in the NFS startup script); opts, which specifies NFS mount options, and vfstype, which tells your computer what kind of share it is (we use “nfs” here, but other types of mounts are possible).
For an NFS mount of an NFS share from another Mac, I recommend using the values shown here (substitute your computer’s name and the name of your shared directory, of course):
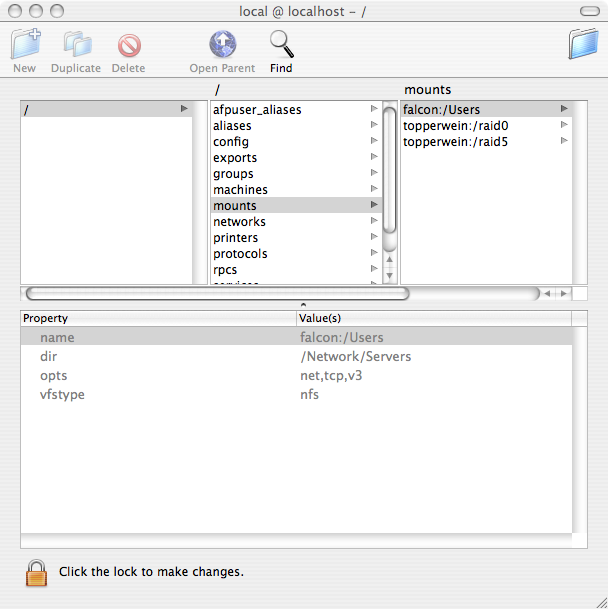
The values shown will create a mount point that uses NFS version 3 over TCP (instead of the older version 2 over UDP), and the net keyword makes this a dynamic mountpoint that will be automatically mounted upon access and then automatically unmounted after a period of inactivity. The net keyword, together with the value of the dir property, will also make your other computer visible under Network->Servers in the Finder, allowing you to mount and browse your other computer’s shared directory merely by clicking through to it.
You can repeat the above procedure for as many mount points as you wish to define. Note that when mounting NFS shares from non-OS X computers, you will also need to add the “resvports” option to the opts property, which causes OS X to perform the mount using a so-called “privileged” network port, as required by many other operating systems. An example for mounting my FreeBSD server’s shares looks like this:

topperwein:/raid5 has a similar definition.
To make these changes visible on your client computer, you have two choices:
Save your work via cmd-S. Congratulations! You’re done!
For further discussion, go to the next page.
$Date: 2007/01/11 08:47:54 $